
Your ads will be inserted here by
Easy Plugin for AdSense.
Please go to the plugin admin page to
Paste your ad code OR
Suppress this ad slot.

Thanks to Pinterest, I stumbled across this recipe and thought it was interesting. So what the heck, let’s give it a try. Speaking of Pinterest, is anyone else obsessed with using it? I recently got my friend into it and I’ve now created a pinterest monster! There should be a Pinterest Anonymous for addicts. Who else agrees? Raise your hand!
And speaking of friends, check out my other friend’s new website. Fifty Shades of Flavor. She just started the blog but please give her a visit so she can feel the love. It’s all about her eating, cooking and dining experiences. It’s a blog with an interesting twist. 🙂
Anyway, let’s get back to some Pressure Cooking!
INGREDIENTS:
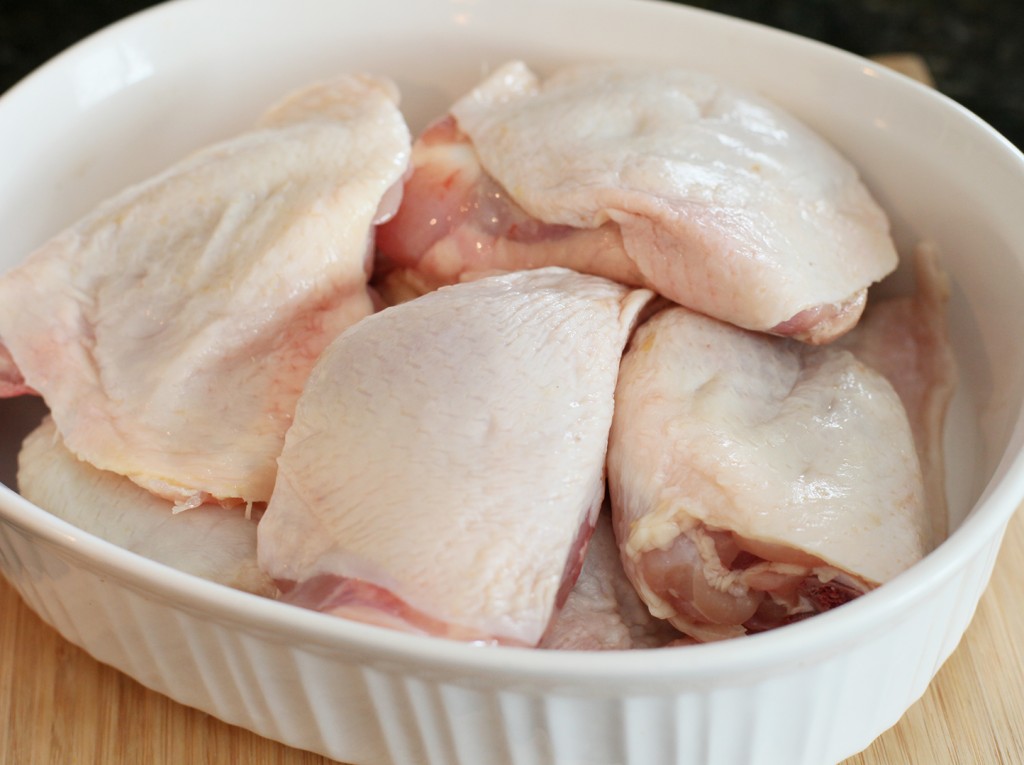
- 2 lbs. Chicken Thighs (You can use chicken breast to cut down on the calories.)
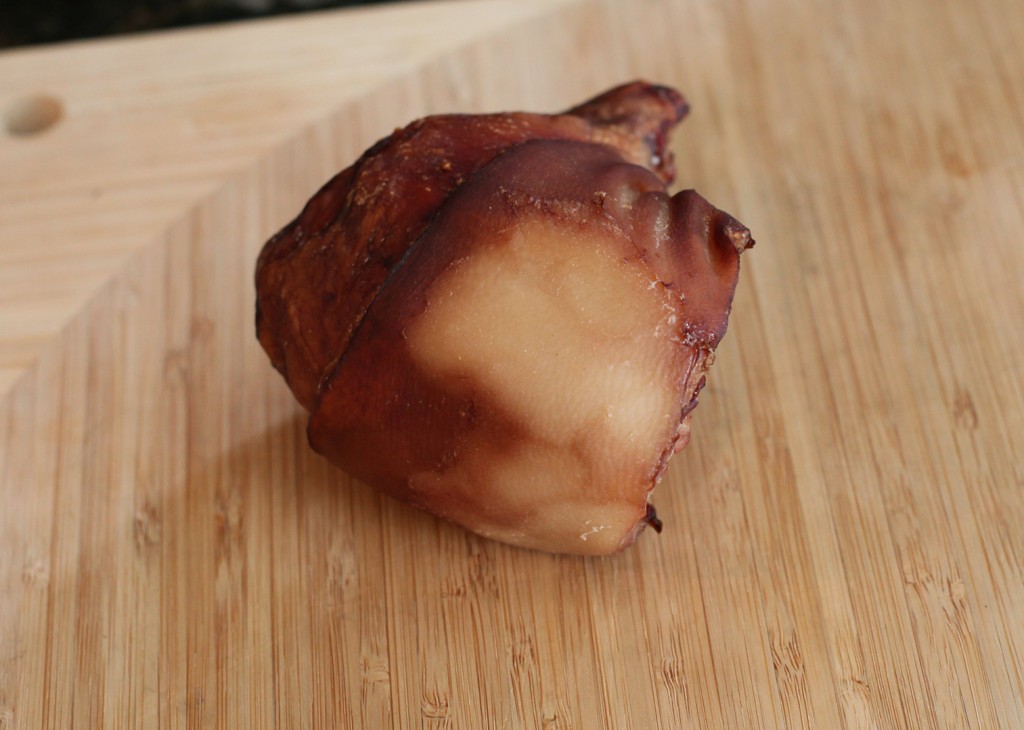
- 1 Ham Hock (I used this because the recipe called for Pancetta, and I didn’t have any. Oops)
- 2 Cups Chopped Carrots (Frozen of fresh, but for the love of god, don’t use baby carrots anymore!)
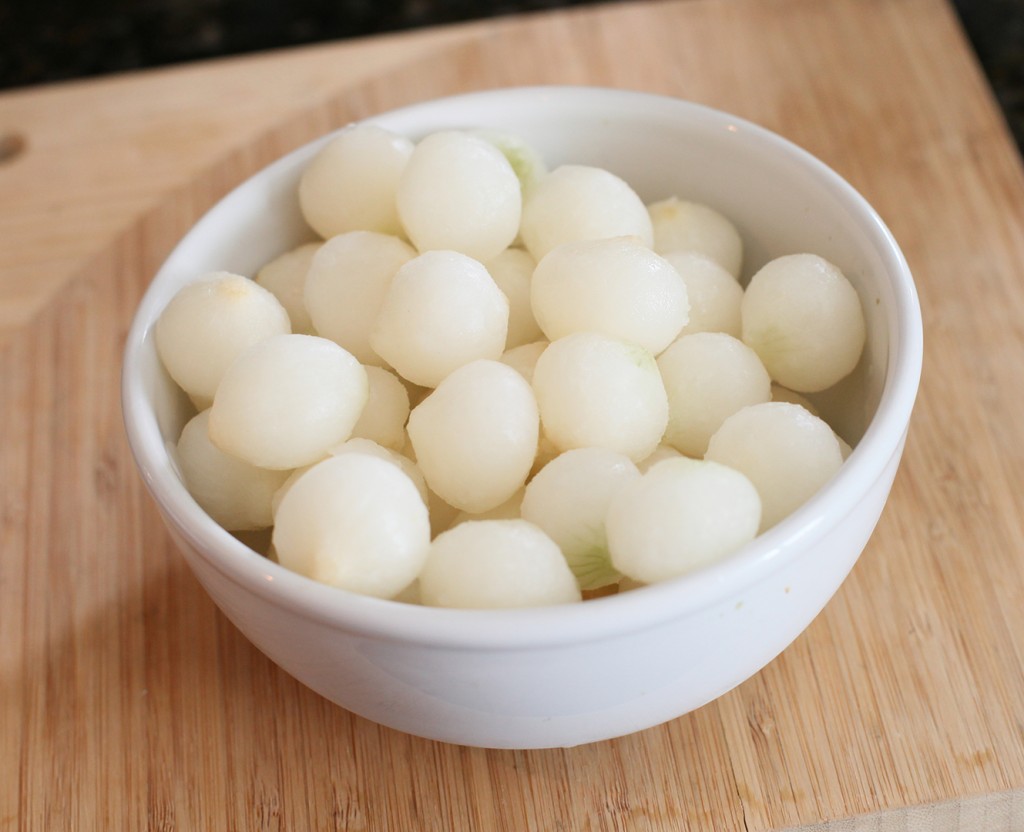
- 2 Cups Pearl Onions (Frozen or fresh)
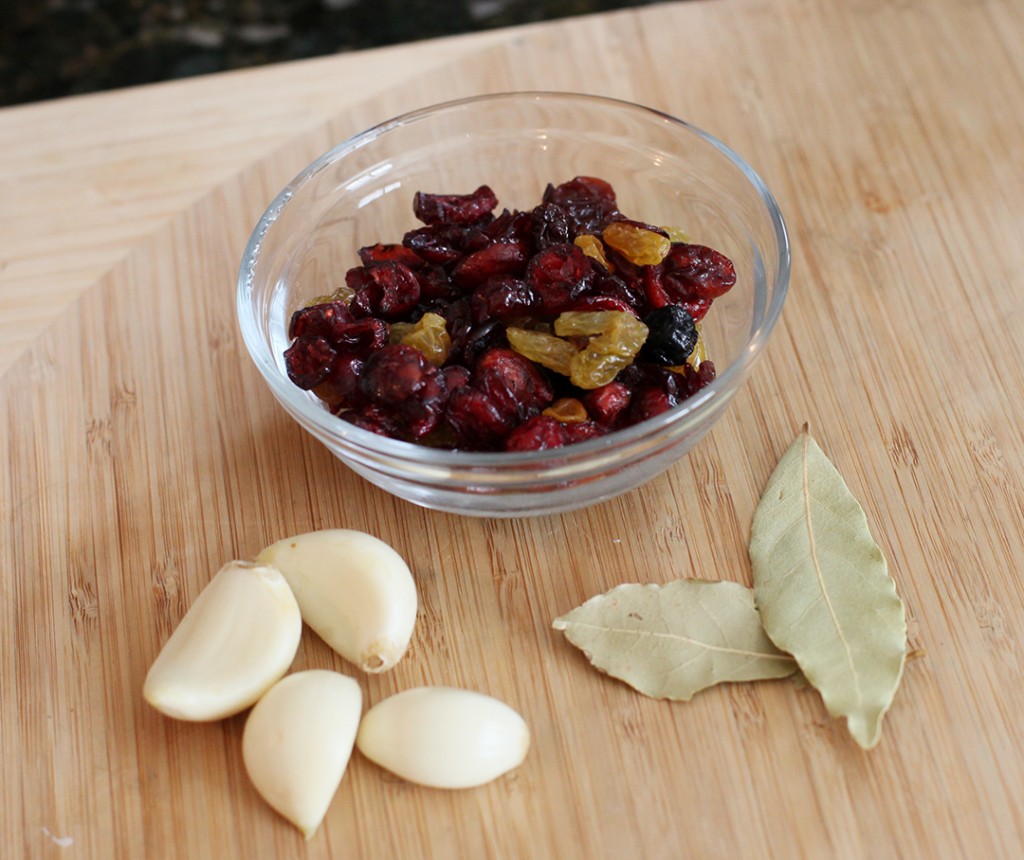
- 1 Cup Dried Mixed Berries (You can use any kind, a mix or just golden raisins.)
- 2 Bay Leaves
- 4 Cloves of Garlic
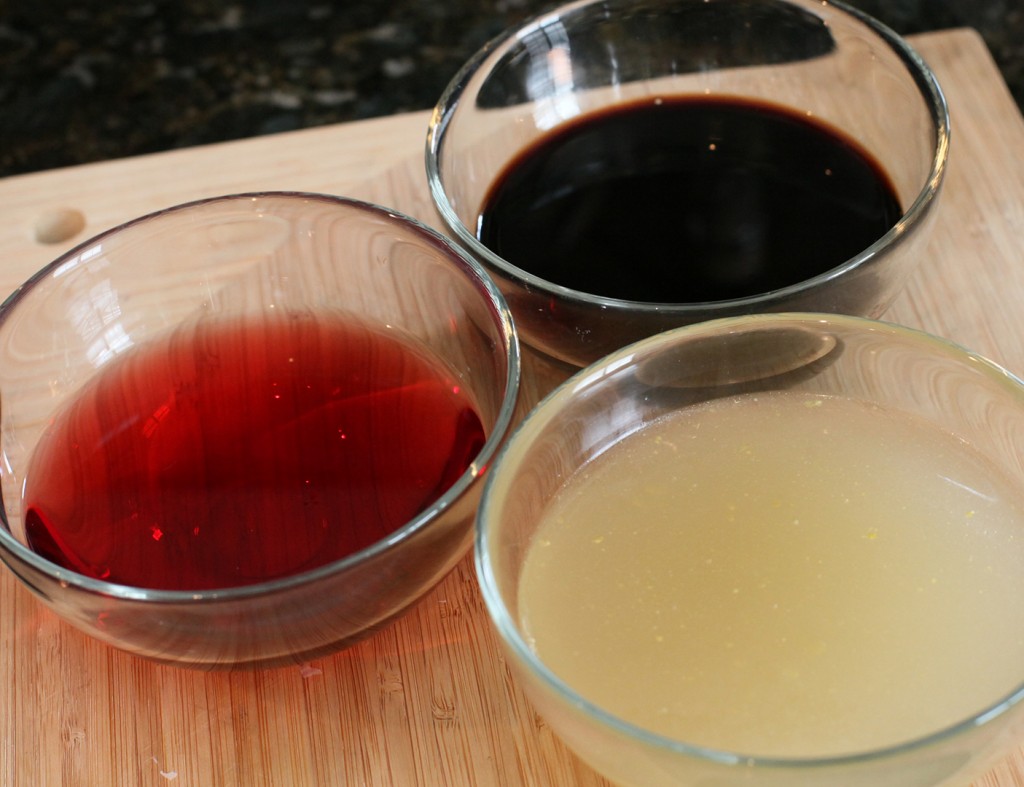
- 1/4 Cup Balsamic Vinegar
- 1/4 Cup Red Wine Vinegar
- 1/2 Cup Chicken Broth (You can honestly omit this ingredient since the chicken itself releases a lot of liquid already. I was going to say chicken juice but changed my mind. :P)

Alright, there is no easy way to say this but……put everything into the pot!
Your ads will be inserted here by
Easy Plugin for AdSense.
Please go to the plugin admin page to
Paste your ad code OR
Suppress this ad slot.
Do it! Do it quick!
See if you can do it all under 30 seconds!
Ready, set, GO!
In all seriousness, season the chicken a bit on both sides with salt and pepper. Then put the ham hock and the chicken down first into the bottom of the inner cook pot. Then everything else in no particular order. The chicken will brown a bit on the side that is touching the bottom of the pot.
Close the locking lid on your pressure cooker. Make sure the Pressure Valve is set to Airtight.
Depending on the model and brand of pressure cooker you have. Press the POULTRY or CHICKEN program button on your machine. OR you can program it to cook for 17-minutes. Press START and it’s ready to go!
Let’s see…..what did I do while my chicken was cooking? Oh, that’s right! I did absolutely nothing!!! YAY!!!
When your precious beloved pressure cooker gives you the signal, *beep beep*, it’s time to release the pressure. You know the drill. Carefully turn the Pressure Valve on the top to EXHAUST or RELEASE or whatever it says and wait for all the steam and pressure to release. The Float Valve will drop, allowing you to unlock the lid.
You’ll notice that the level of liquids inside the pot has doubled almost. I’m telling you, chicken loves releasing their chicken juice! Use a pair of tongs and carefully remove all the chicken. And I do mean carefully. Chicken also loves to fall apart when it’s pressure cooked. Set the chicken aside and go back to the remaining sauce. Ladle out or pour out about half of that liquid and return it back to the pressure cooker to reduce/thicken the sauce. Press the START button to turn on the heating system. Reduce the sauce so it becomes nice and thick. Help it along by adding flour or cornstarch if you like.
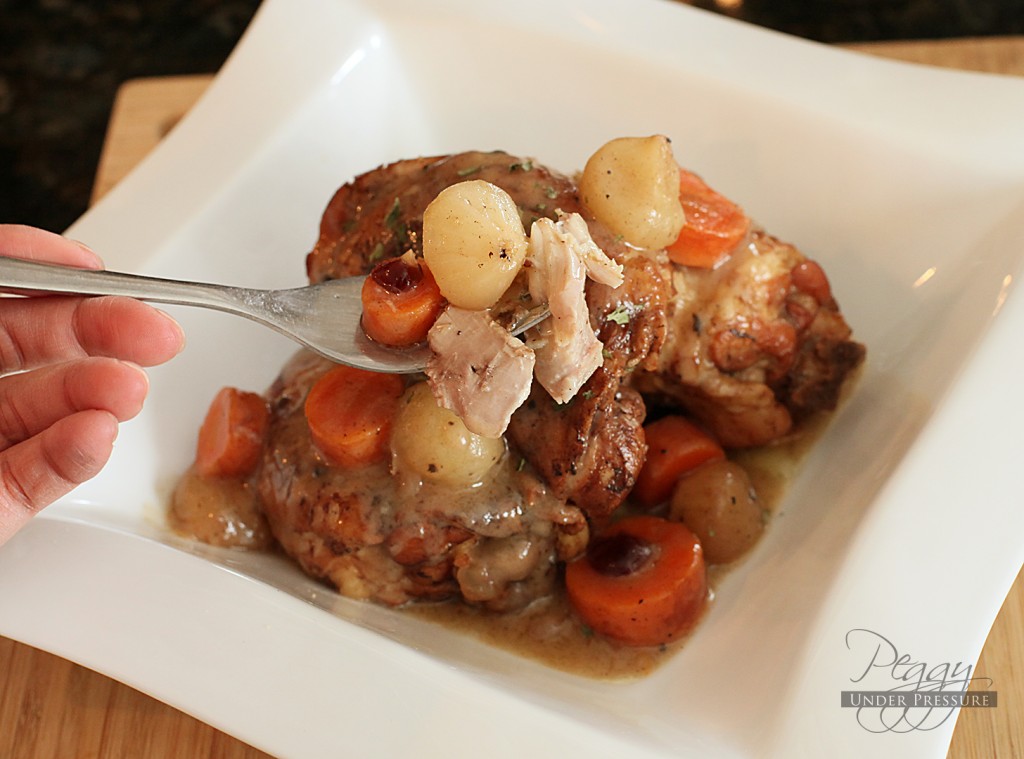
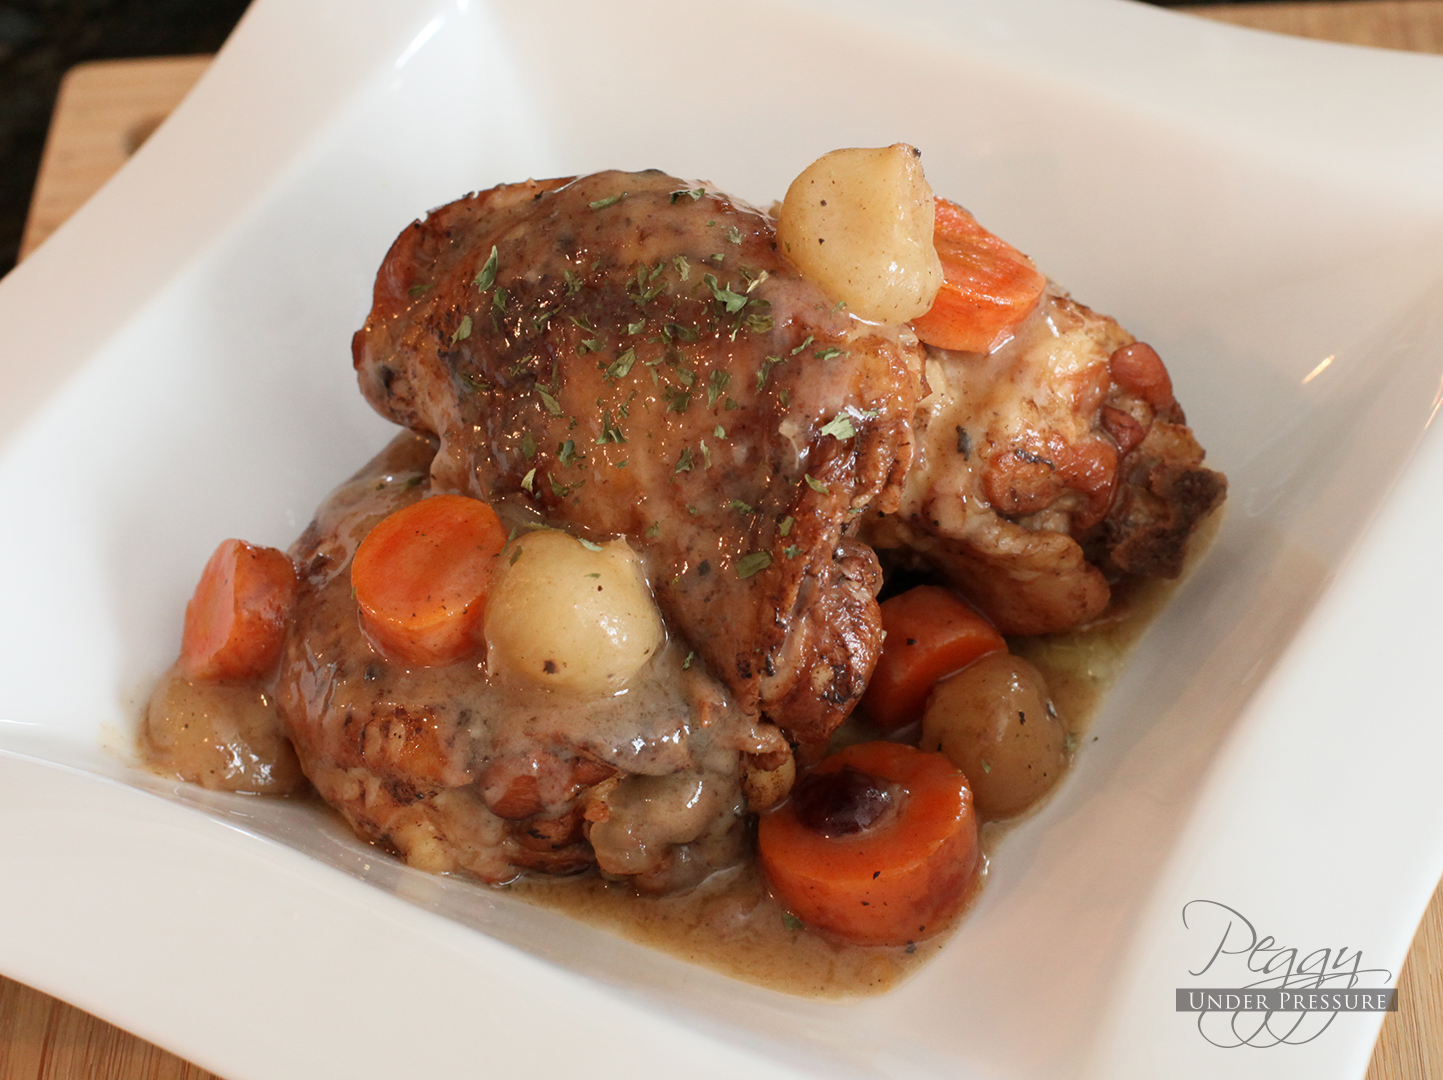
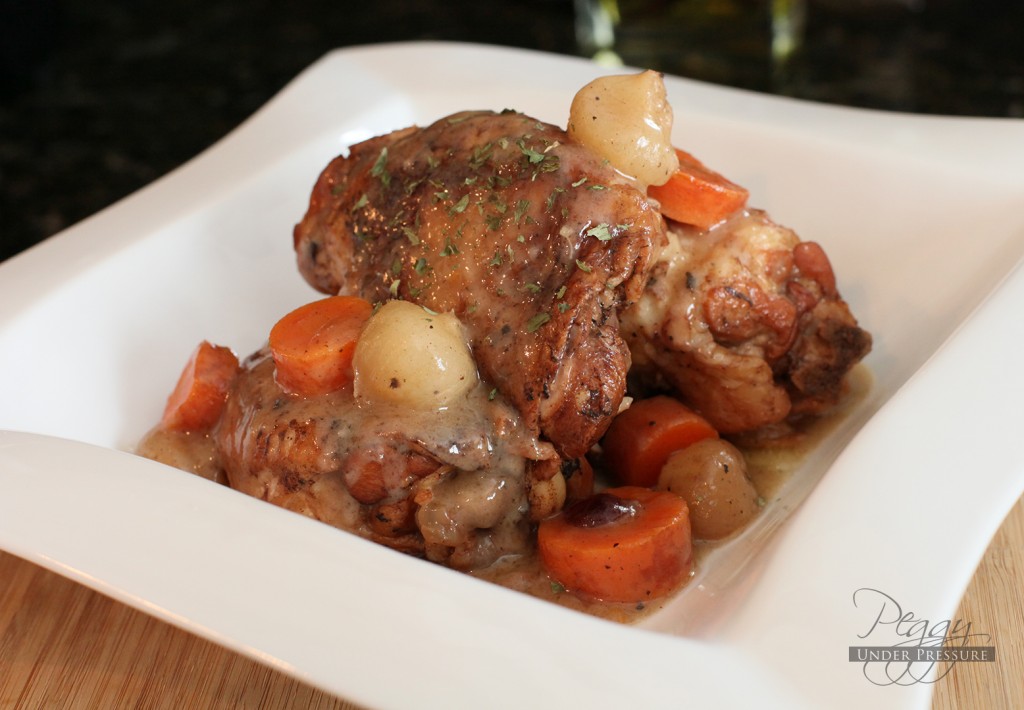
Once the sauce is thickened to the desired consistency. Return the chicken carefully back into the sauce. Set the pressure cooker to Keep Warm until it’s ready to serve. You can serve it with rice or mashed potatoes. The chicken, as usual, was super duper incredibly moist! And the flavors were a bit tangy and sweet. I had expected the vinegar to be overpowering, but they weren’t at all. The dried berries added a slight touch of sweetness so make sure you get a bit of that with each bite!
This was the first recipe that I made with my brand-new 6 quart Cuisenart pressure cooker. I did substitute pearl onions with some regular onions and shallots and I did half-and-half dark and white meat and it turned out wonderful. The Balsamic vinegar did give it a nice sweet taste and tangy as well. It was almost like sweet-and-sour chicken. Thank you thank you thank you.
Now to try more.
I am pretty sure it was suppose to be 1/4 cup of each of the vinegar’s. I wasted a bunch of vegetables. This is one of those rare occasions were you should look at the pictures, instead of read the instructions…lol
Hi! I made this tonight and it was delicious. I used skin on, bone in chicken drumsticks instead of thighs. The only thing that I noticed is that the skin didn’t get browned or crispy. It got mushy and fell off. The flavors were fantastic, but I would have liked the texture to be a little different.
I may have only cooked the chicken for 10 minutes, too. Would that make a difference? I couldn’t remember if I set the timer for 17 or 27. So I stopped it with 7 minutes left. It was all cooked, so I figured it didn’t really matter.
This is only my third time using my pressure cooker… So far I LOVE it.
This is a good recipe for beginning pressure cooking because the chicken comes out so perfectly tender and the recipe so flavorful and easy that you just can’t help wonder how you lived this long without a pressure cooker. Yum!
Awesome! Garnished with walnuts
Why no baby carrots? Lol
Just bought electric pressure cooker. The old ones scared me lol. Thanks for the recipe
Made this last night and it came out very good. My wife is working nights so I have to rush home to get a nutritious, hot, fast meal on the table and this one worked well. I was in a hurry and use frozen chopped onions (couldn’t find pearl onions) and threw in some breasts for my picky son. I left the juices in the pressure cooker with some of the carrots and onions, added a little flour and used my immersion blender to make a gravy. Thanks for posting the recipe.
i had a Revereware pressure cooker a long time ago. I quit using it because I could no longer get the seal to work properly. I have recently purchased a new pressure cooker. This will be my first recipe in the new cooker. I can hardly wait!
When everything mostly done and you go back to thicken the sauce alone you say you press start. I’m am assuming the lid is open for stirring etc. But my pot does not stay hot. Do I need to press start twice? Close lid? I ended up poring suave in different pot and thickened on stove top. Please help cause had the same problem trying to thicken sauce for gravy on Italian pot roast. But other than that your recipes are delish
new electric press cooker, cany o try all your electric recipes thx a lot
OMG!!!!!! OH YUM!!!! That was OUTSTANDING! The berries and the vinegar… Just everything cooked together SOOOO Beautifully!!!! Thank You SOO much!!!!
Cindy, I know you wrote years ago but in case someone else has this problem about how to thicken the broth for gravy…the new Inst pots have a sauté setting. This heats up and it’s like a pan on the stove, you can brown your meats and veggies like onions ahead of the pressure cooking. Hope this makes sense to you. Have fun, I love the new cookers.
Family loved this meal. The sauce is wonderful. Will make this again.